

How To Apply Static Effect To Camera Unreal
Unreal Engine is the globe'due south about open up and advanced real-time 3D creation tool for photoreal visuals and immersive experiences. One of the popular applications of Unreal Engine is creating video game. However, creating and visualising architecture is not very different fromthe process of creating a videogame: you lot import the models y'all're going to apply, prepare your 3D library, so enjoy positioning objects and characters in the scene. Ane of the phases involves obtaining static renders of your 3D models to view your projection in the almost realistic style.
In today'due south blog, nosotros volition discover the piece of cake fashion to generate static renders using Unreal Engine four with just 5 steps by sharing of Miguel Albo – an architect who specializes in creating 3D compages with Unreal Engine 4.
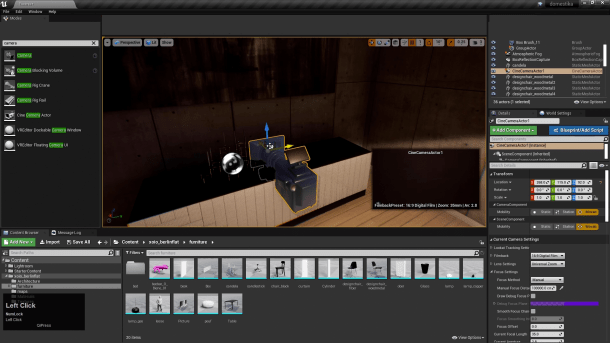
First ready up your photographic camera to capture the scene. Head to the search field on the left of the screen and observe the best option for your project. Miguel Albo recommends using a picture show photographic camera. Set it up to rotate easily, giving you a ameliorate view of the scene.
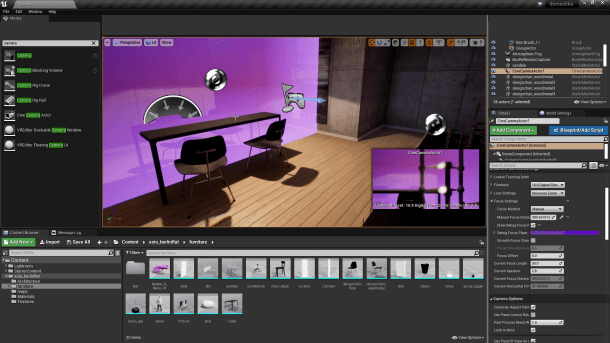
The small screen on the right of the interface shows what the camera sees andDetails allows you to change camera settings, such every bit depth of field, proportion, the format or focal distance.
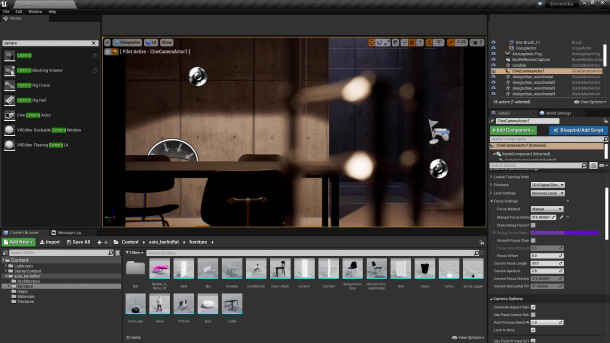
Draw debug focus plane is very useful for establishing your focal point in terms of the focal distance. It allows yous to set the focus plane by simply clicking on a indicate thank you to the dropper tool. In one case you take it, you tin accommodate the value to place the focus anywhere you demand. Deactivate the focus plane once it's been set and adjust the focal distance or discontinuity settings.
Hither's a lilliputian trick for you. In thePerspective tab located in the top left of the Unreal Engine iv interface on the home page, select your camera to look through it. This is very useful when you want to focus on details of the image you will obtain once the project has been rendered. Don't forget to deactivate the camera command to move back through the scene.
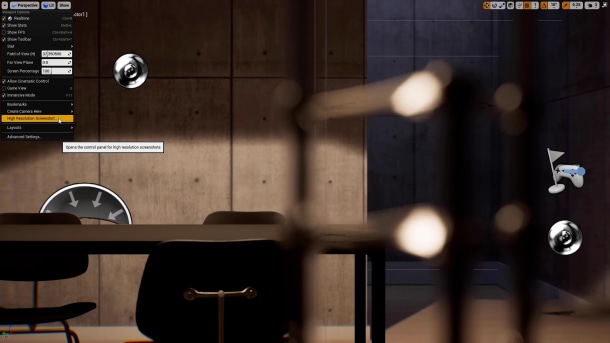
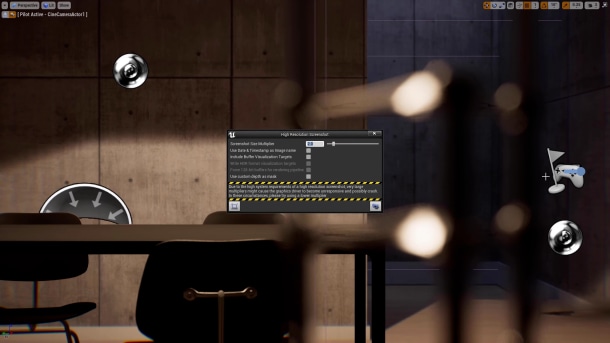
Once you accept the camera in position and nether control, press F11 to view the scene in total screen. Select the drop-down menu on the elevation left, then clickHigh Resolution Screenshot to create a screen shot.
The machine will automatically open a tab where you'll exist able to modify the resolution of your render.
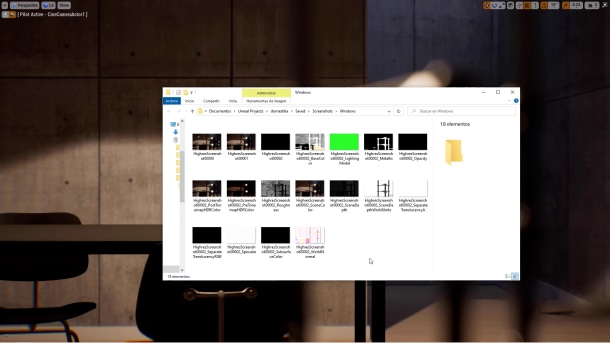
Remember that the screenshot will utilise your screen resolution by default, simply you can change the multiplier. In other words, if you enter one.0 inScreenshot Size Multiplier, you'll obtain an image with the same resolution every bit your monitor. If you want to achieve a 4k image, you need to enter 2.0 inScreenshot Size Multiplier. ClickAccept a Screenshot which will open a path to the place where your rendered images take been saved. If yous desire to remove the render symbols, press G in the project tab and accept a new screenshot.
You lot tin remove individual rendering elements that can so be used to postal service-procedure the epitome, create photomontages, etc. It's very simple, merely select theInclude Buffer Visualization Targets option then clickHave a Screenshot. You'll find all the render elements in the screenshot folder.
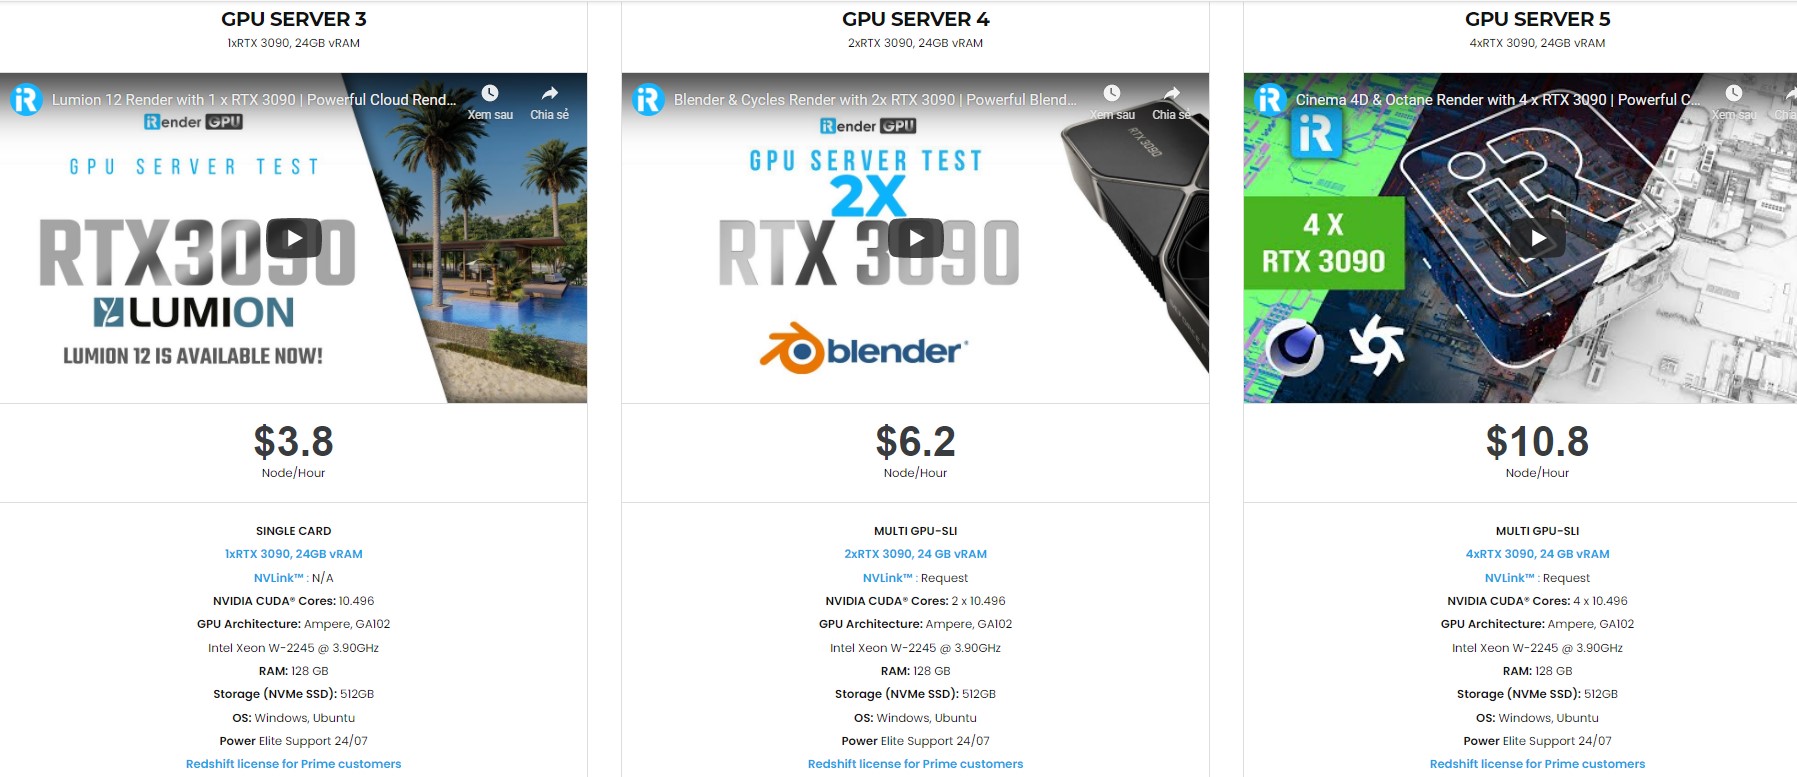
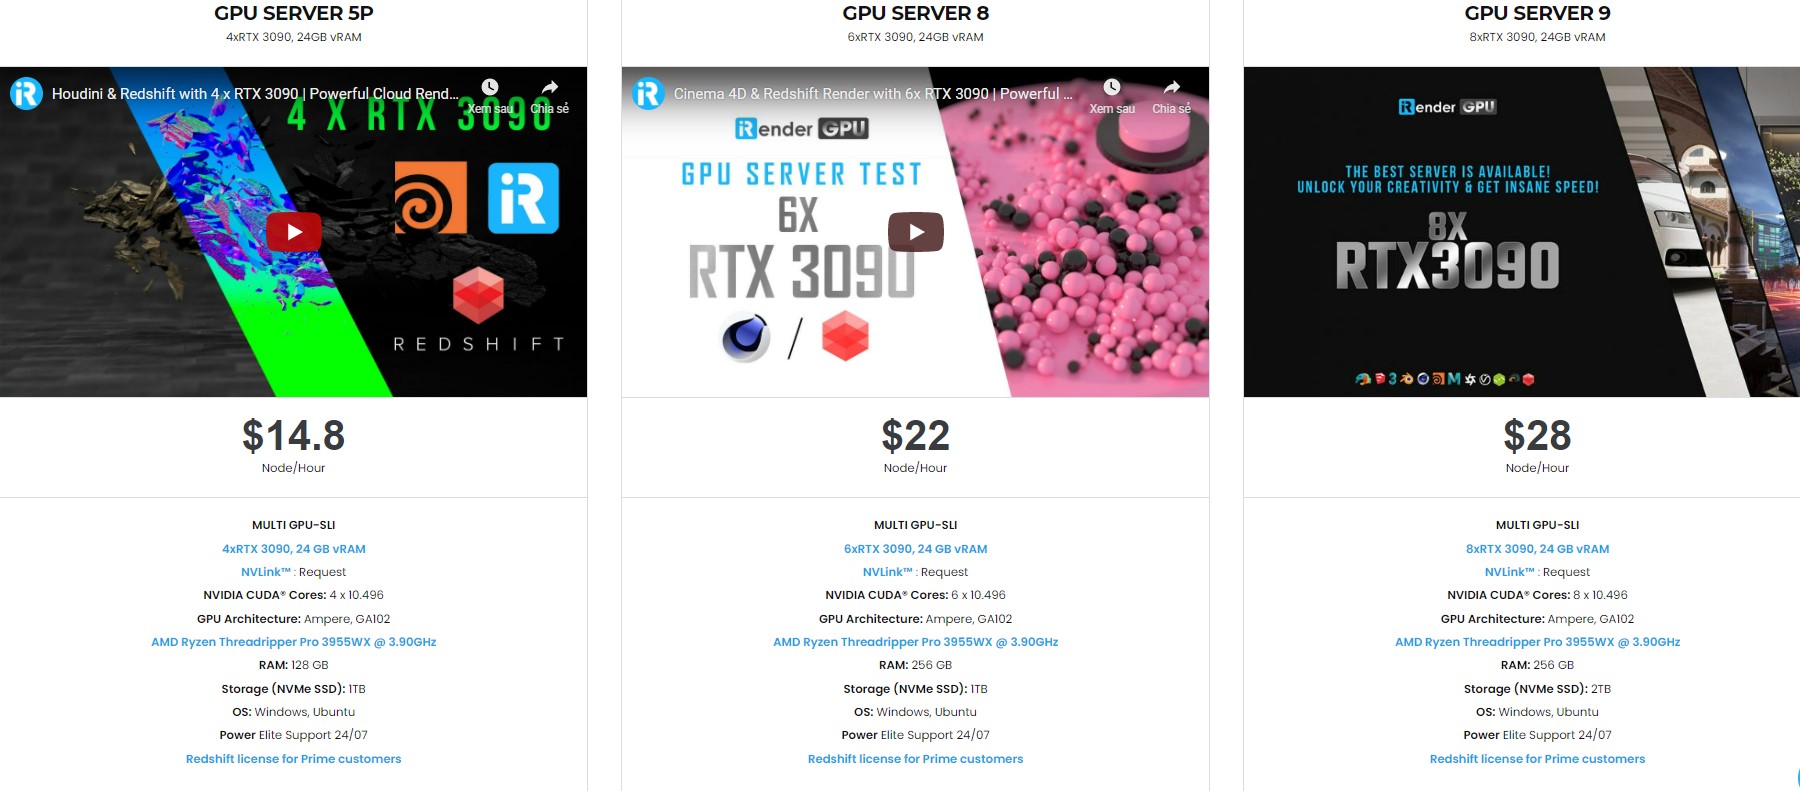
iRenderis a GPU-Acceleration Cloud Rendering Service forMulti-GPU Rendering withPowerful Render Nodes: 2/iv/6/8x RTX 3090, provides high calculating operation on the model of IaaS (Infrastructure-every bit-a-Service). Users willremotely connect to our server, install any version of Unreal Engine only one time and hands do any intensive tasks similar using their local computers.
- Single and Multi-GPU servers: 1/2/four/6/8x RTX 3090.NVIDIA RTX 3090– the most powerful graphic card.
- 24 GB vRAMchapters, fitting to the heaviest images and scenes.NVLink/SLIrequested for bigger vRAM.
- ARAMcapacity of 128/256 GB.
- Storage (NVMe SSD):512GB/1TB/2TB.
- Intel Xeon Westward-2245orAMD Ryzen Threadripper Pro 3955WX CPUwith a high clock speed of3.90GHz.
With all the outstanding advantages mentioned to a higher place, you lot must take plant yourself the perfect selection for Unreal Engine . We provide unmatched support tailored to your specific needs and goals. SPECIAL Offer for this January: Get 20% BONUS for all newly registered users. Let's Cheque IT OUT!

For more advice and support, please practice not hesitate to accomplish us via Whatsapp: +(84) 915875500. Register an ACCOUNT today and get Gratis COUPON to experience our service.
Thank you & Happy Rendering!
Source: https://irendering.net/how-to-create-static-renders-with-unreal-engine-4/
Posted by: bishopsuese1947.blogspot.com
0 Response to "How To Apply Static Effect To Camera Unreal"
Post a Comment