

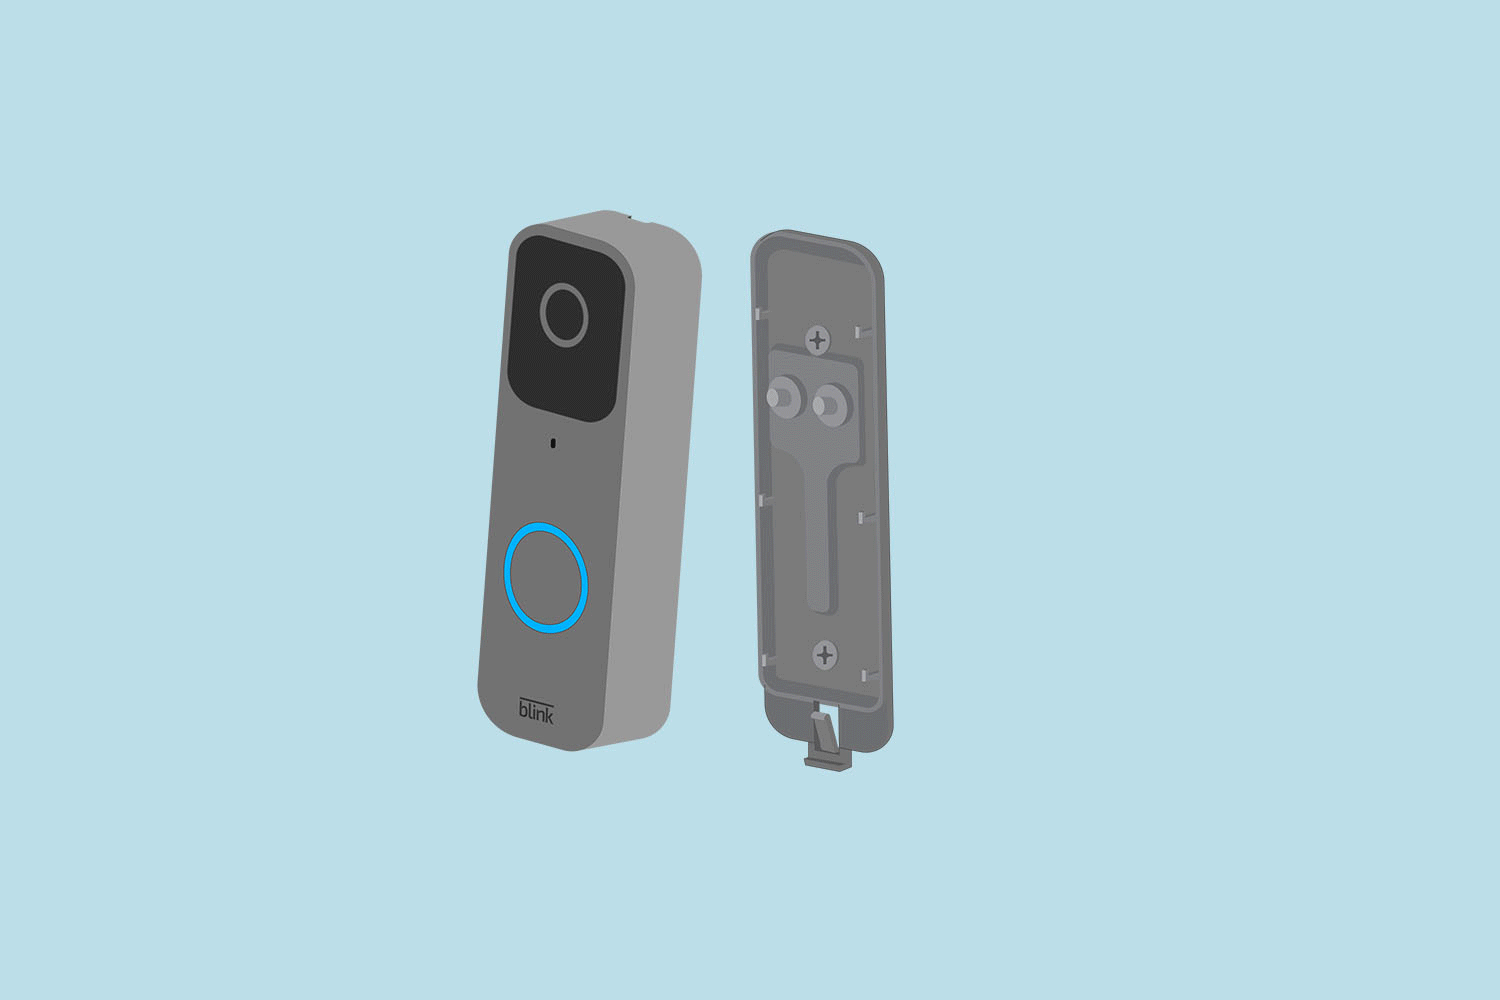
How To Install Blink Doorbell Camera
Blink Video Doorbell wired installation
In a "wired" installation, the Blink Video Doorbell is continued to chime-wiring that you already accept. When the Glimmer doorbell button is pressed, the wiring circuit is closed, and the chinkle rings. The Blink Video Doorbell is always powered by batteries not the wiring.
Delete
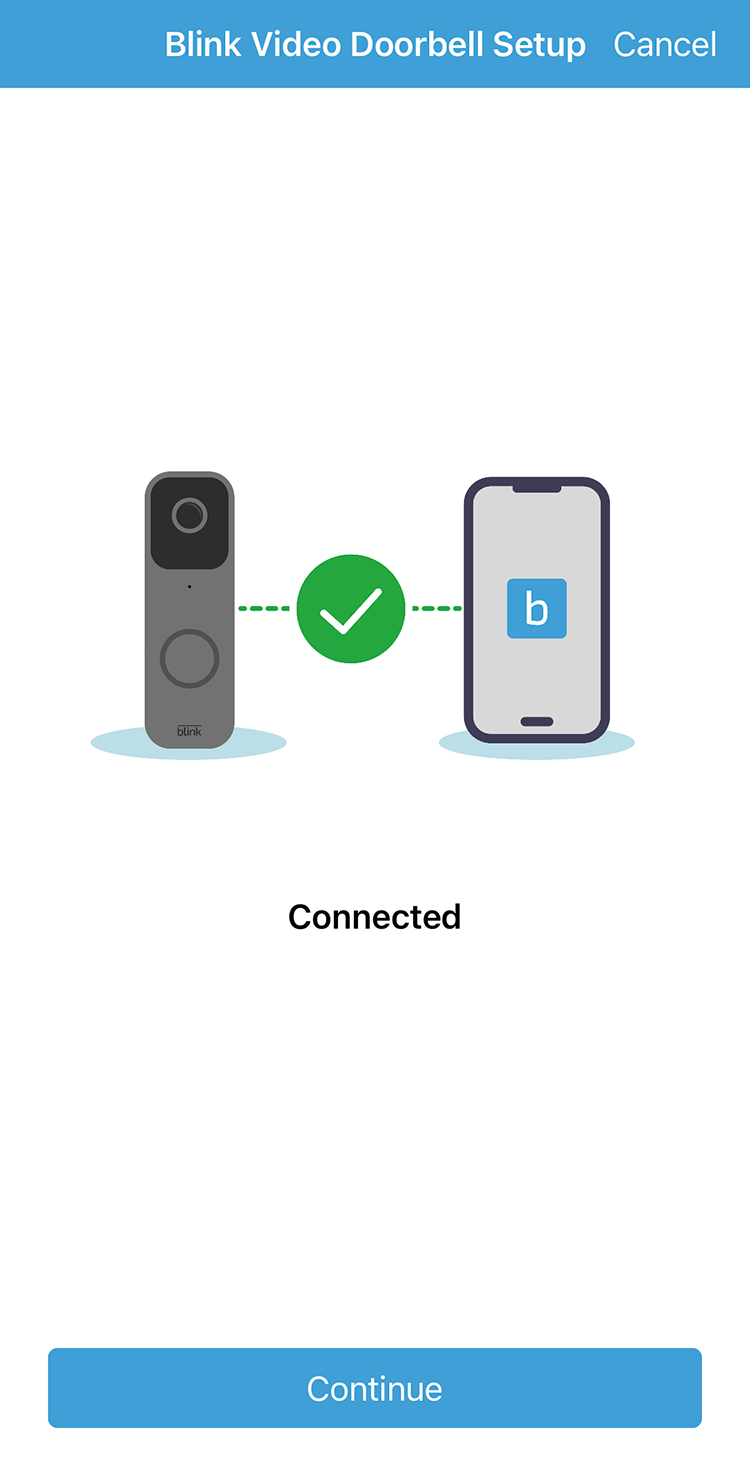
Once the Blink Video Doorbell has been added to your system and you have called to consummate a wired connexion, the following screen appears in the Glimmer app.
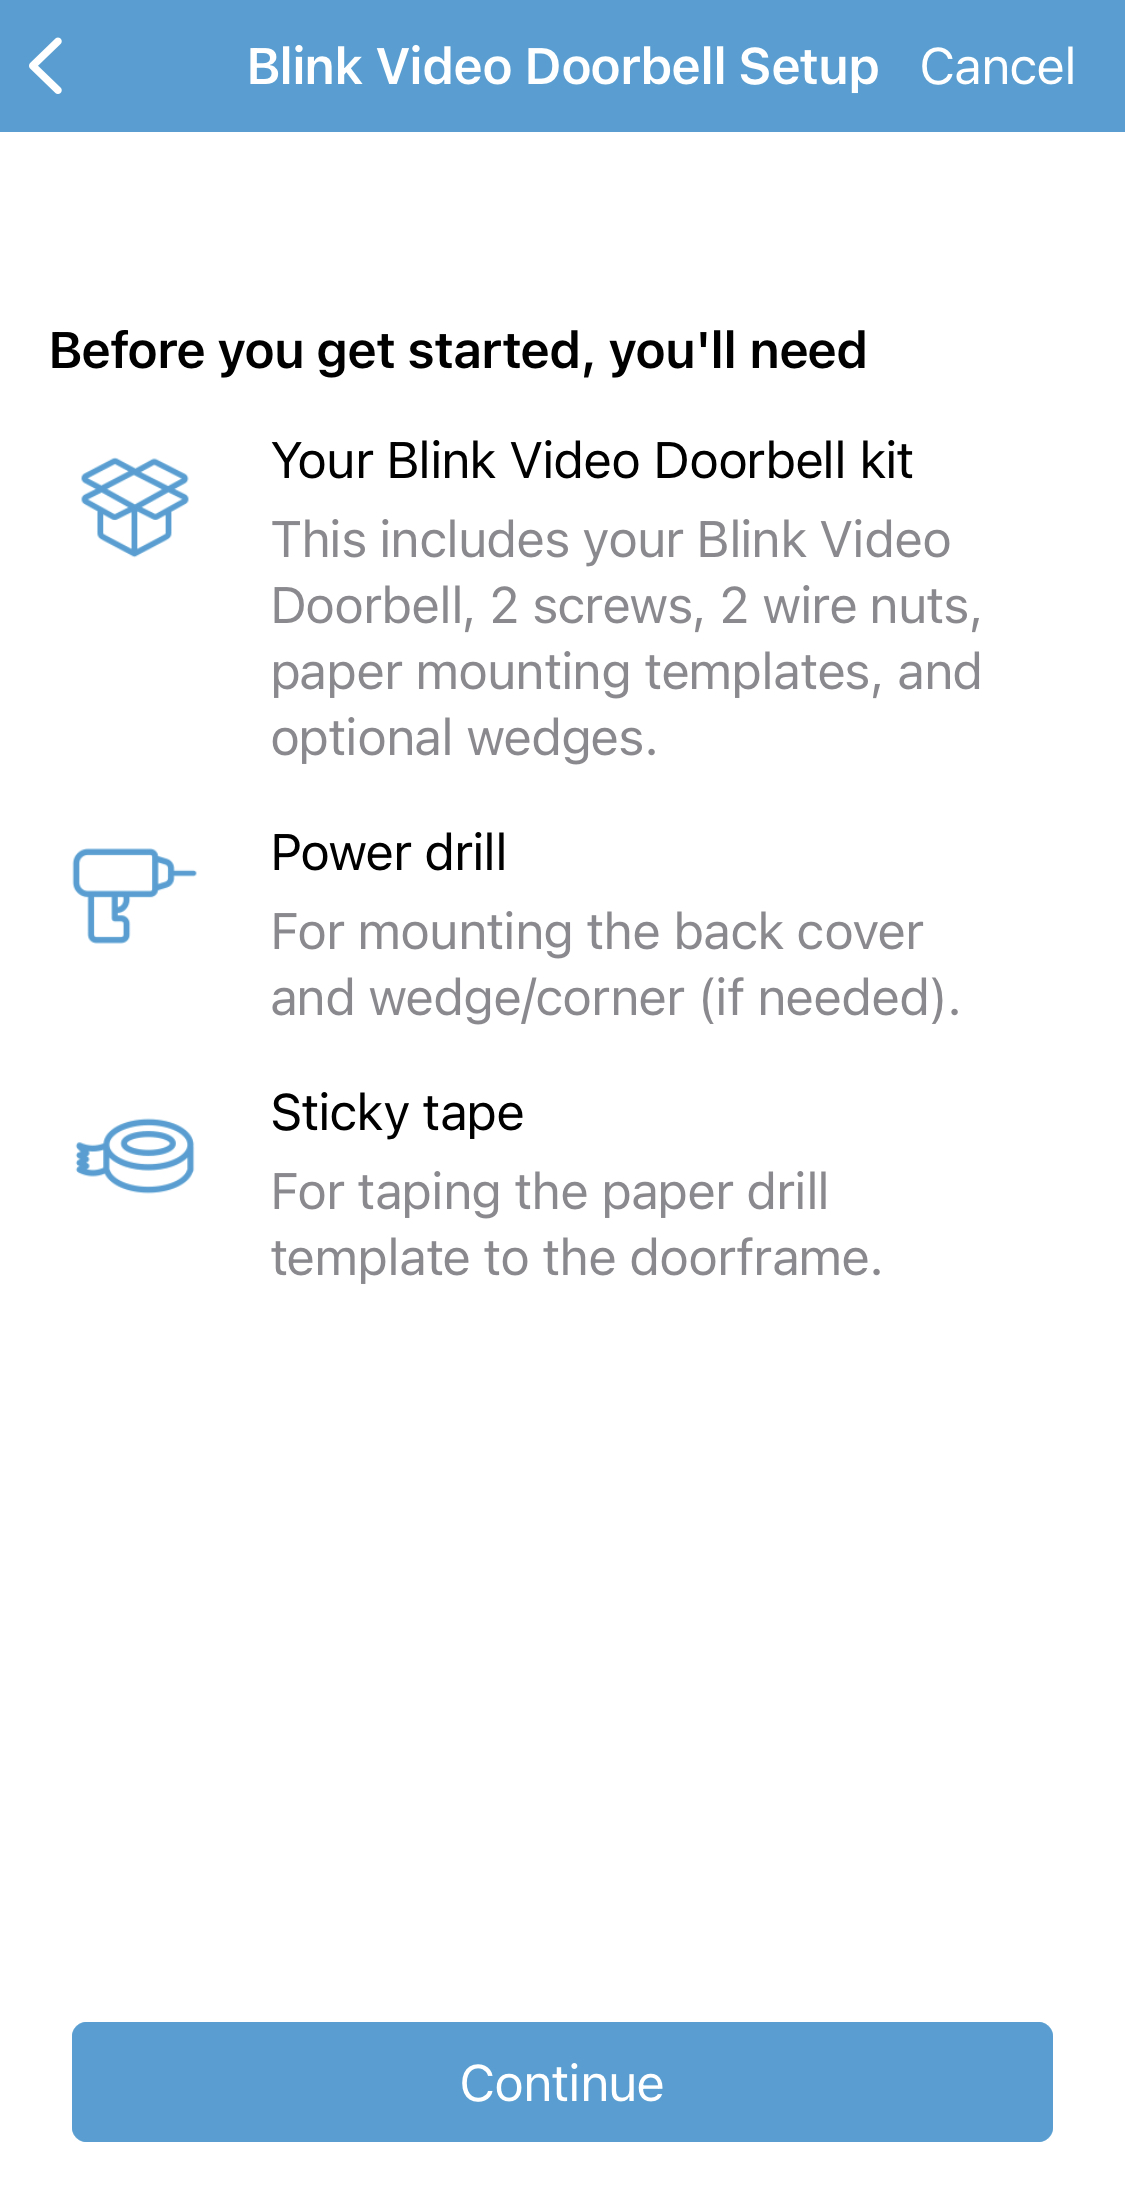
When you have the required items (the Doorbell kit, a power drill, and tape) tap "Continue".
Next, yous are presented with a screen that describes the power requirements and a checkbox to show that yous know your chime fits within these limits: 16 - 24 volts Air conditioning at 50 - 60Hz, and 40VA maximum.
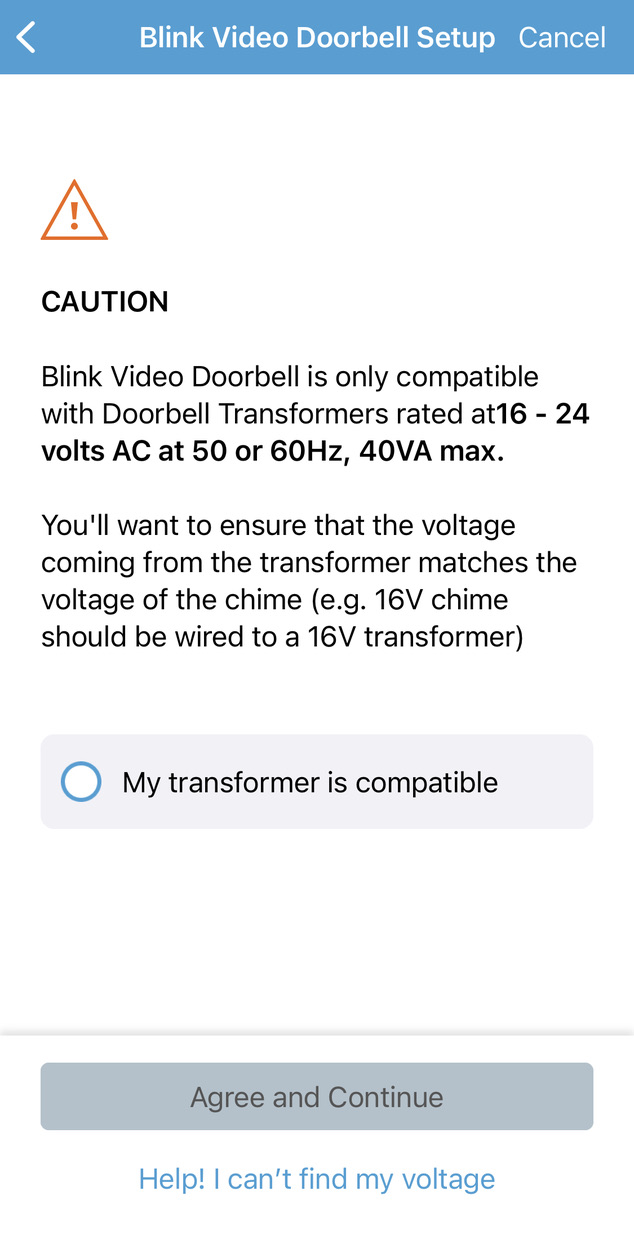
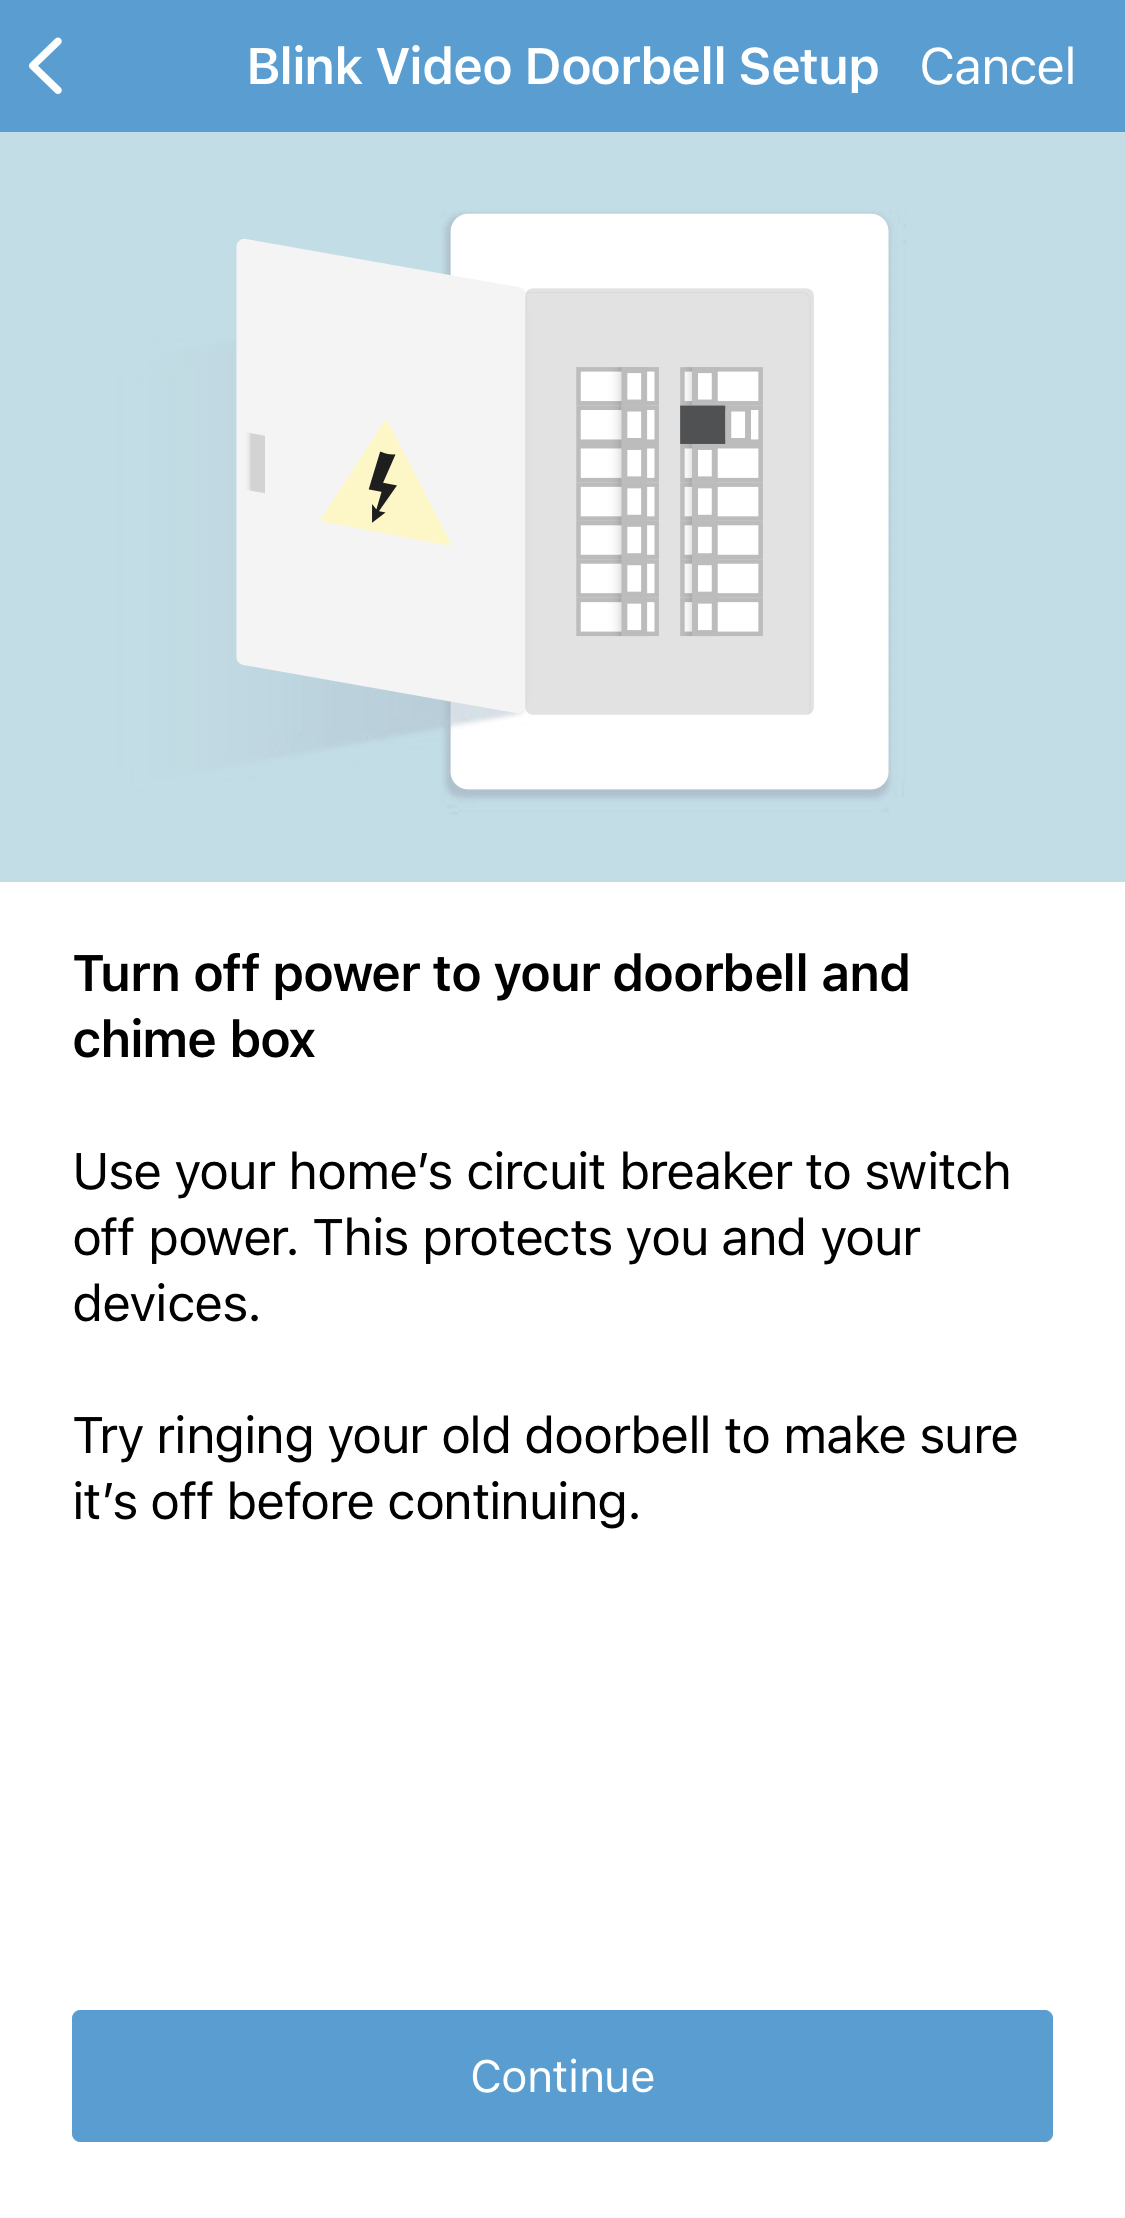
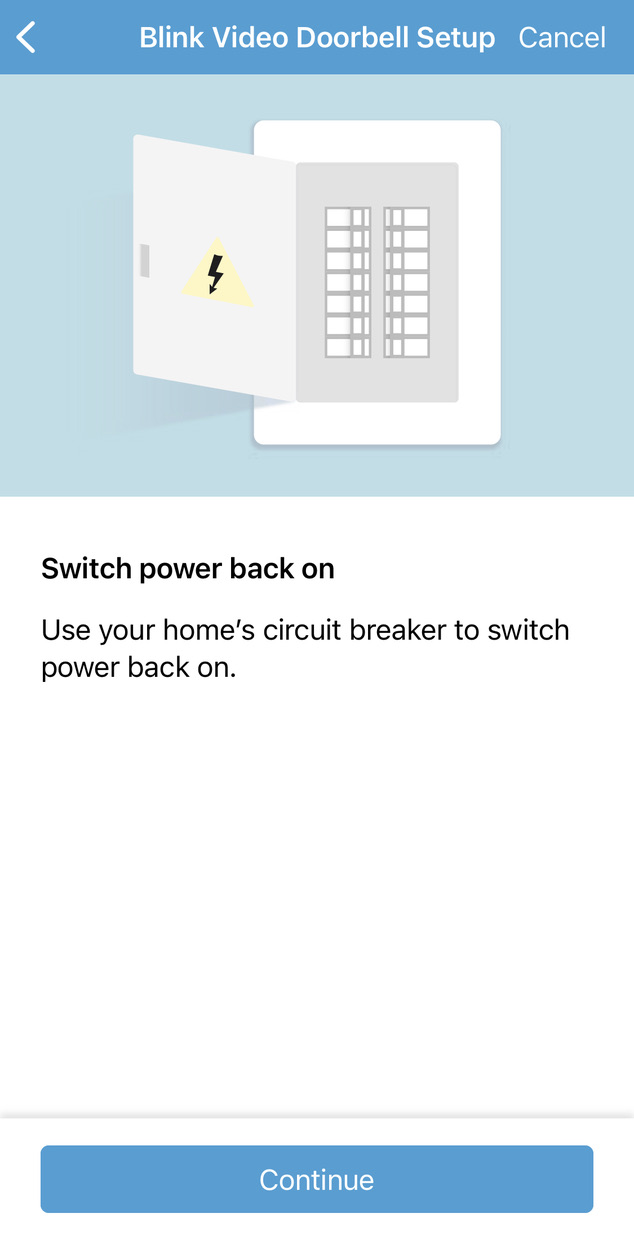
Tap "Concur and Continue", then yous are guided to plow off electric ability to the doorbell and chime yous already have, then tap "Continue".
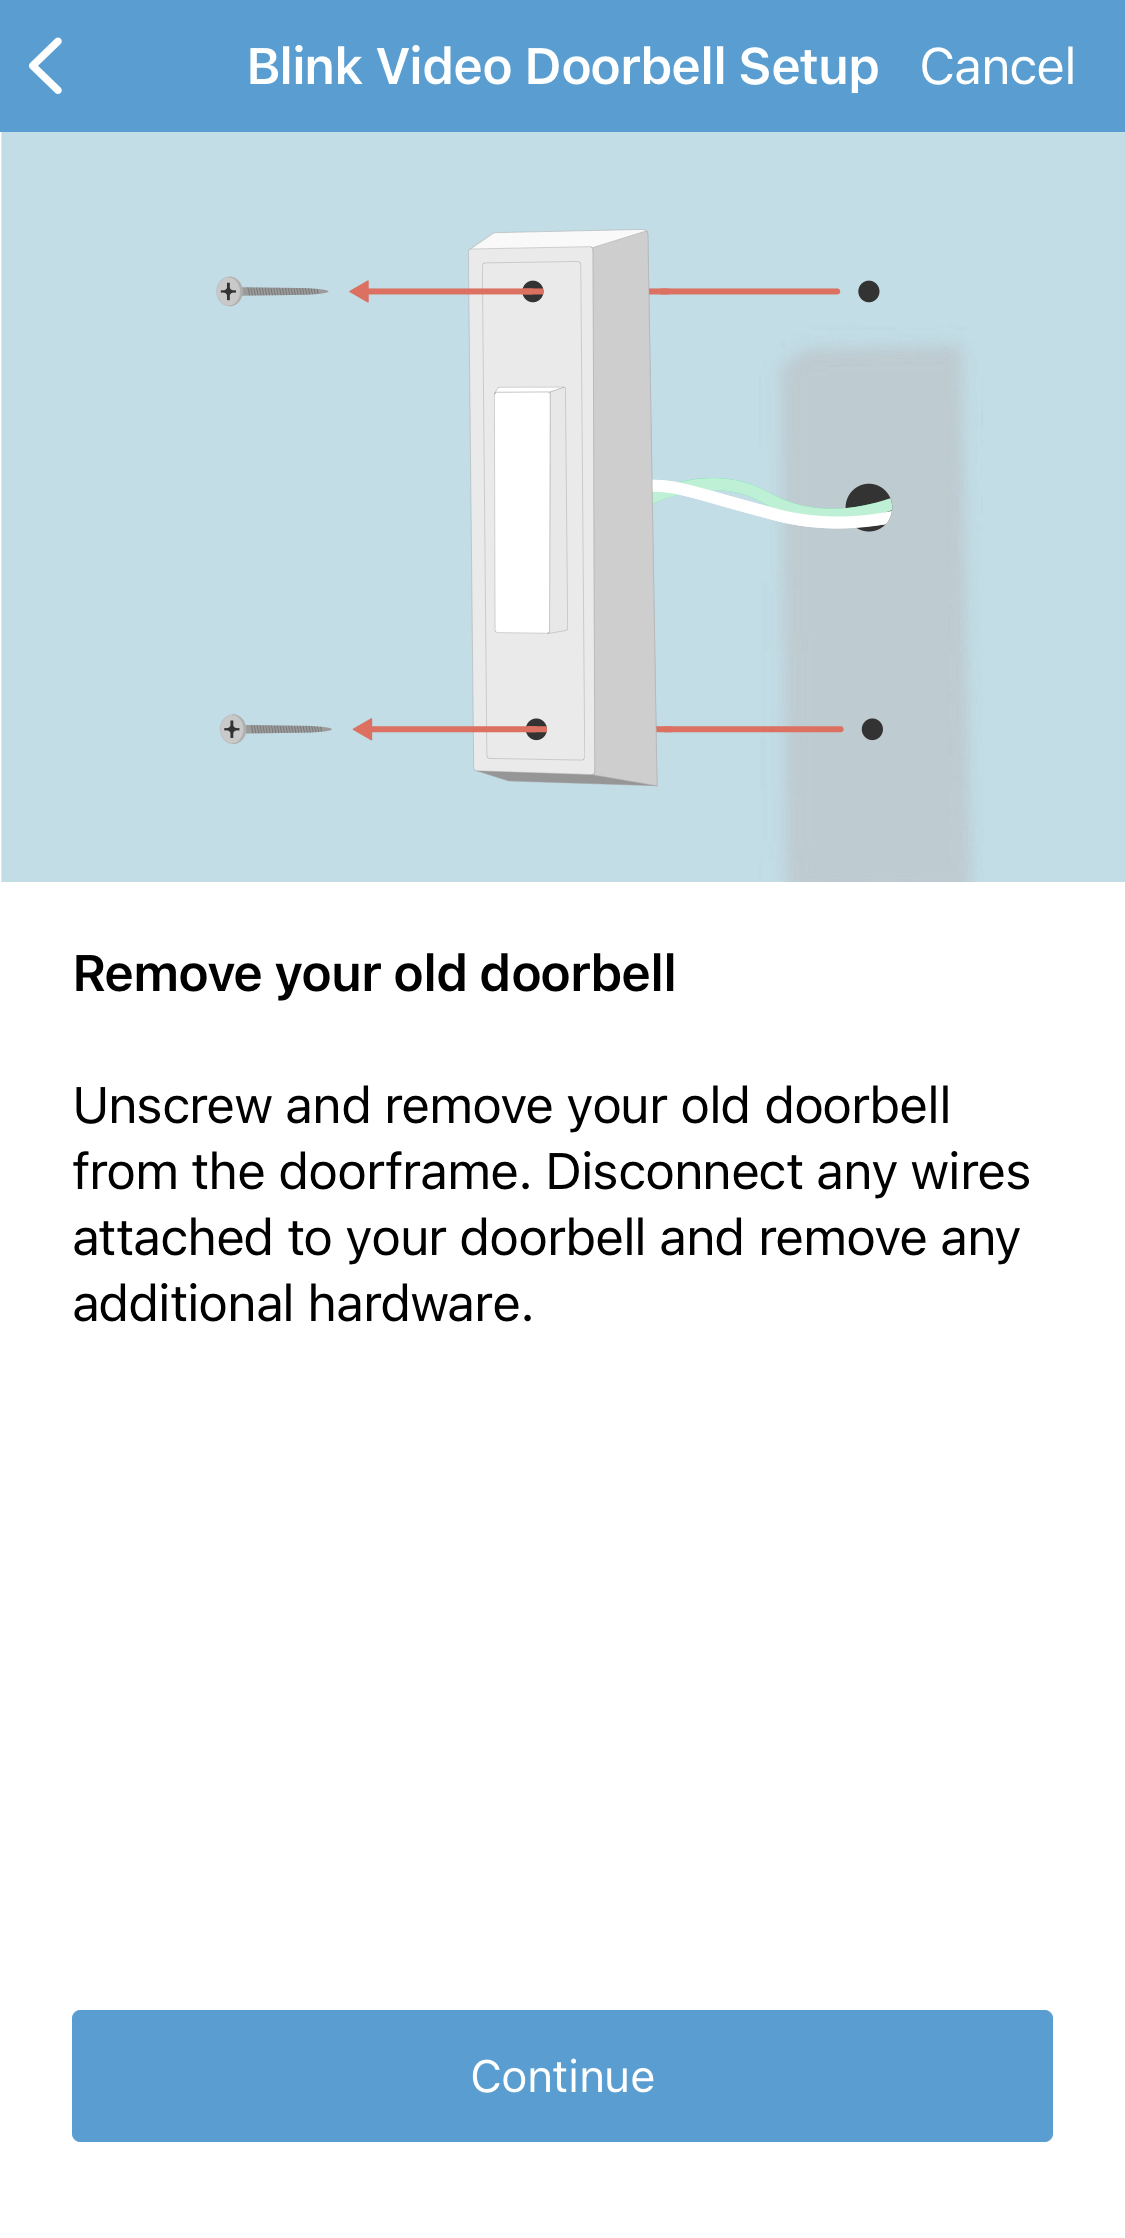
Follow the app instructions to remove your old doorbell.
Are you installing a Wedge or Corner? These can aid suit the doorbell view. Tap the tab below to read the "Yes or No" choices.
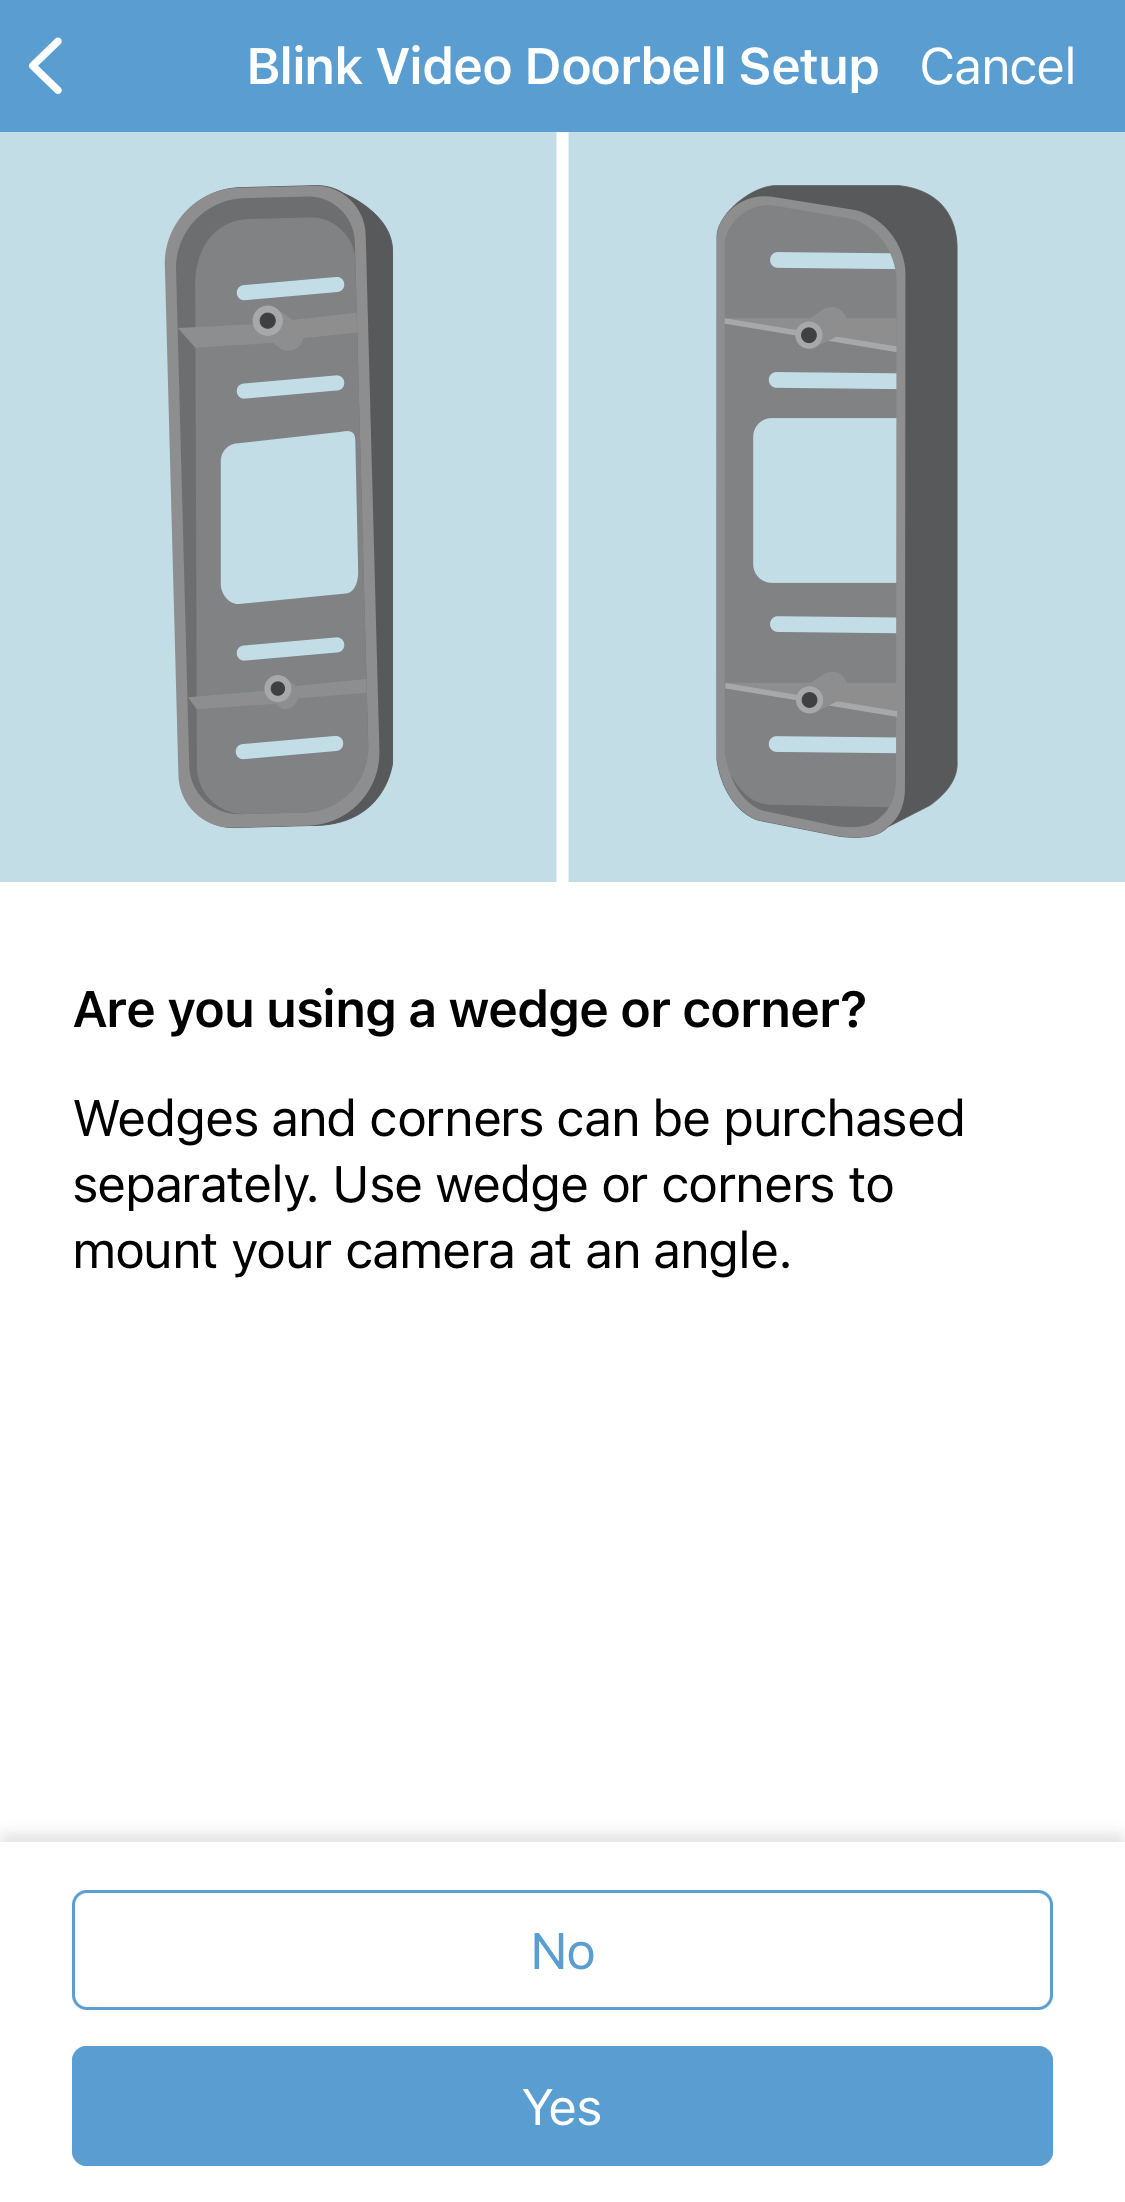
No
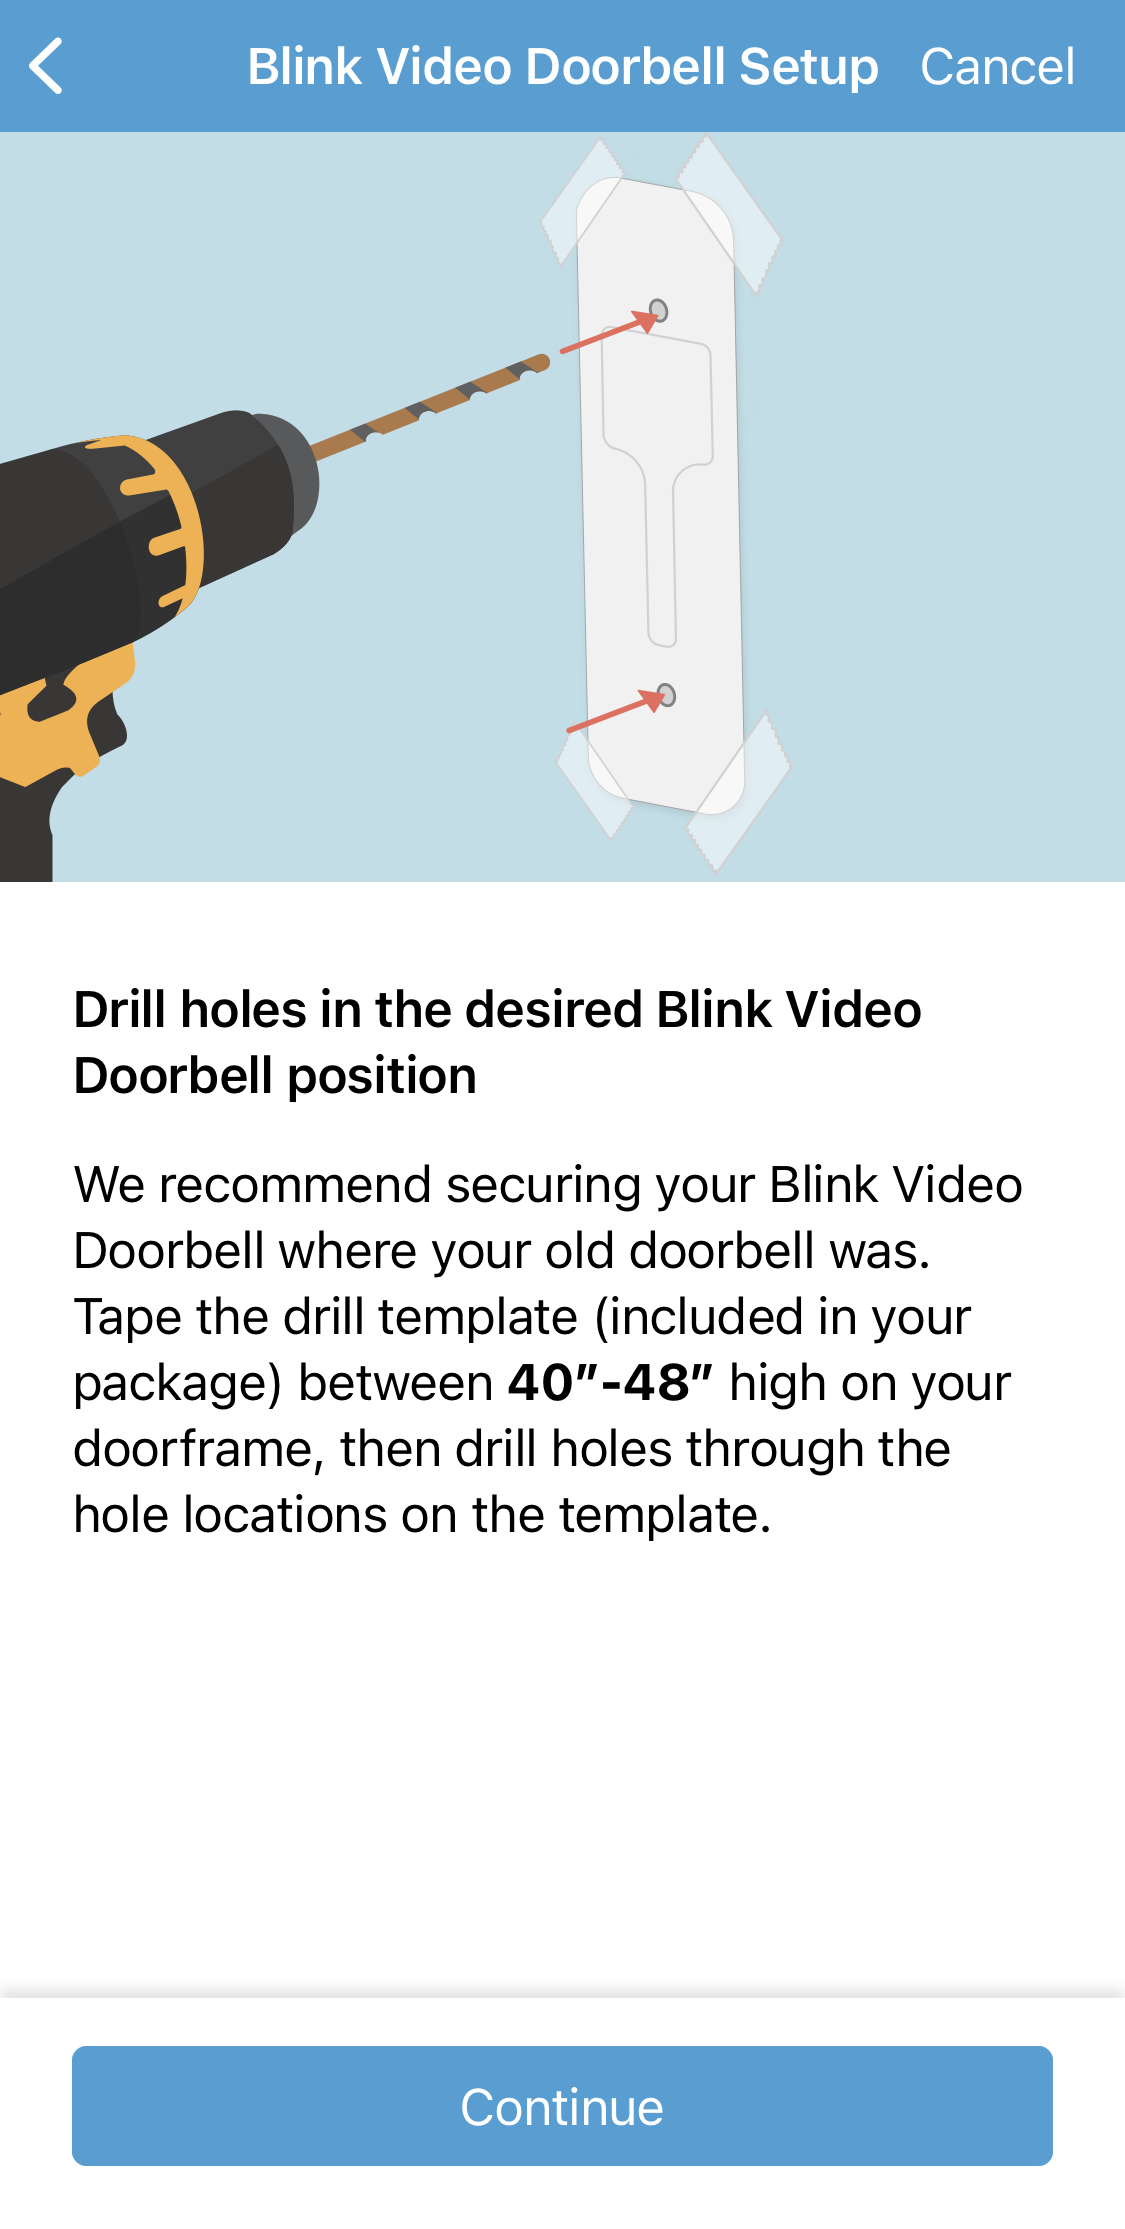
If you are not installing a wedge or corner mount, use the included template to testify where the mounting holes are to be drilled.
Tape the template in place, approximately twoscore to 48 inches (102cm to 122cm) in a higher place the footing.
| Installation and mounting are slightly dissimilar for each type of dorsum plate. If your dorsum plate has screws, follow the left side instructions. | |
| Dorsum plate with screws | Back plate with opening |
| Adhere one doorbell wire to each auto screw on the back plate. Wire color is not a factor for this installation. If needed, 2 extra screws are in the box. | Adhere the dorsum plate to the wall with the ii included screws. On a smooth surface, utilise the top and bottom holes. On an uneven surface, use the peak and middle holes. |
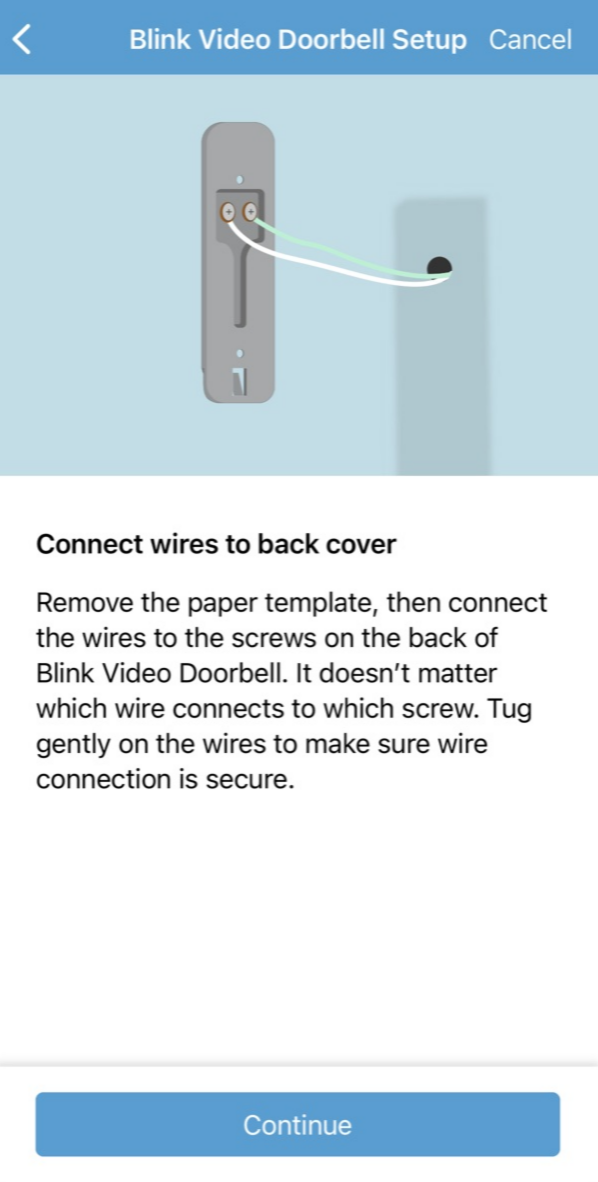 |  |
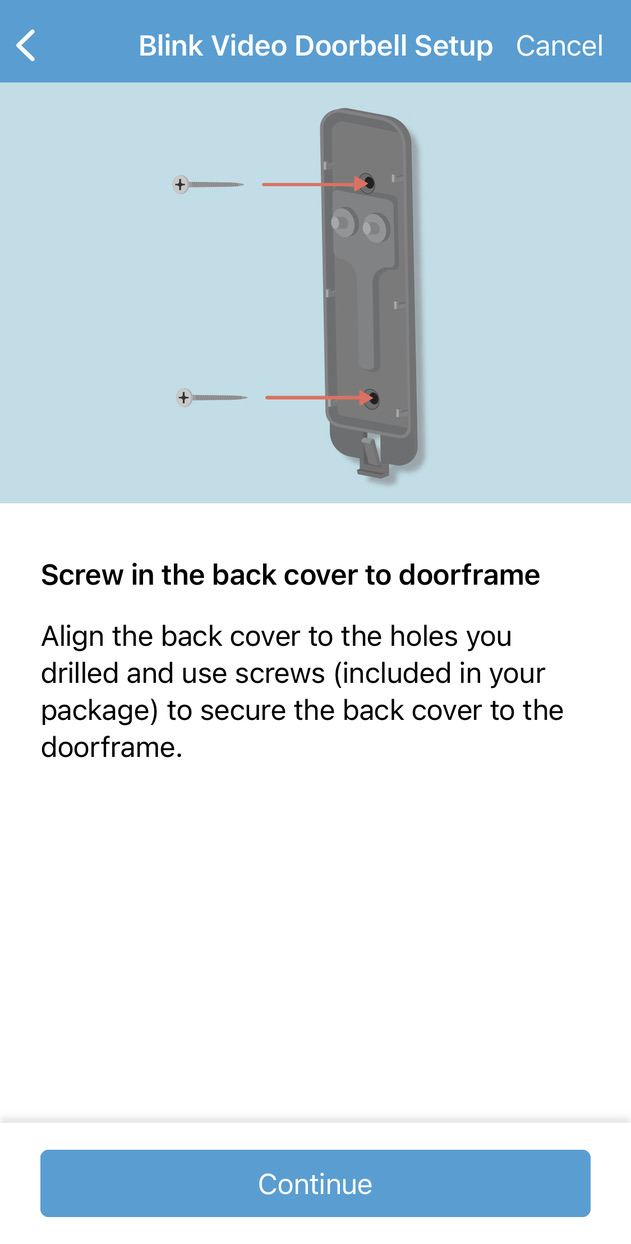
| Adhere the back plate to your surface with the screws that are included. If yous are not using screws, the holes must be covered with waterproof record to keep atmospheric condition resistance. | Attach one doorbell wire to each automobile screw on the doorbell. Wire color is not important here. If needed, two extra screws are in the box. |
 |  |
| Finally, apply a ii step motion to attach the doorbell to the back plate.
 | At present, attach the doorbell to the back plate by lining up the top and pivoting downward. Press until you feel or hear a click and the doorbell is secure. |
Delete
Yes
The camera in the doorbell has a field of view pointing directly out from the mounting surface. If the image does non capture the view you want, adding a wedge or corner mountain can assistance. A Wedge offers 5° vertical tilt (up and down), and a Corner Mountain offers 25° horizontal tilt (side to side).
Click to visit the Amazon purchase folio for the Wedge and Corner Mountain accessories (external link, opens in a new browser window).
How to Install the Wedge or Corner Mount
Cheque the doorbell view and placement by pressing the doorbell button, so in the Blink app, tap the notification y'all receive to enter Live View.
While in Live View, yous are looking out of the doorbell camera. Y'all can adjust the position and location to get the view y'all want, before drilling into your wall.
The included drill template works for the mounts and the doorbell.
1. Drill mounting holes.
Tape the template in identify approximately 40 - 48 inches (102 -122cm) above the ground. If you desire to use the wiring from a doorbell you lot already have, place the template and so that the wires volition reach through the central open expanse of the wedge.
ii. Mount accessory then adhere dorsum plate.
The Wedge and Corner Mount ship with a pair of shortened all-purpose screws. They are meant to exist used to secure the back plate to the accessory ("2" in the image). Use the pointed, regular-length screws to secure the accessory to your wall or surface ("i" in the image). See diagram for more details.
| 1. Regular length multi-purpose screws attach the Wedge or Corner Mount to your location through slots in the accessory. | two. Shortened screws secure the dorsum plate to attachment points molded into the Wedge and Corner Mount. | Doorbell shown attached to Wedge and dorsum plate. |
 | ||
Click for detailed instructions
1. Use the longer pair of screws to secure the wedge or corner mountain, kickoff. Make sure to put the screws through the slot openings as shown.

Wired installation details | |
| Dorsum plate with screws | Dorsum plate with opening |
| Attach one doorbell wire to each machine screw on the back plate. Wire color is not a factor for this installation. If needed, two extra screws are in the box. | Attach the dorsum plate to the wedge or corner mountain, with the shorter pair of screws, included in the accessory packaging. |
 |  |
| Attach the back plate to the wedge or corner mountain, with the shorter pair of screws, included in the accessory packaging. | Attach one doorbell wire to each last screw on the doorbell. Wire colour is non important here. If needed, ii extra screws are in the box. |
 |  |
| Finally, use a two step motion to attach the doorbell to the back plate.
| Now, attach the doorbell to the back plate by lining up the height and pivoting downwards. Press until you experience or hear a click and the doorbell is secure. |
Delete
3. Attach the doorbell and test.
In one case the doorbell is in place, if it has already been prepare upwardly, press the doorbell button and you volition receive an alert notification. Tap the notification to encounter through the doorbell camera and make sure the view is what you want. If y'all have non prepare the doorbell even so, visit Setting upward your Blink Video Doorbell.
If yous have set an Action Zone or Privacy Zone, be aware of how they have been affected by the change in camera view. Y'all may have to re-set the Activeness or Privacy zones.
Click to learn more about Glimmer Video Doorbell Motion Detection.
Delete
Side by side, you are asked to turn power back on.
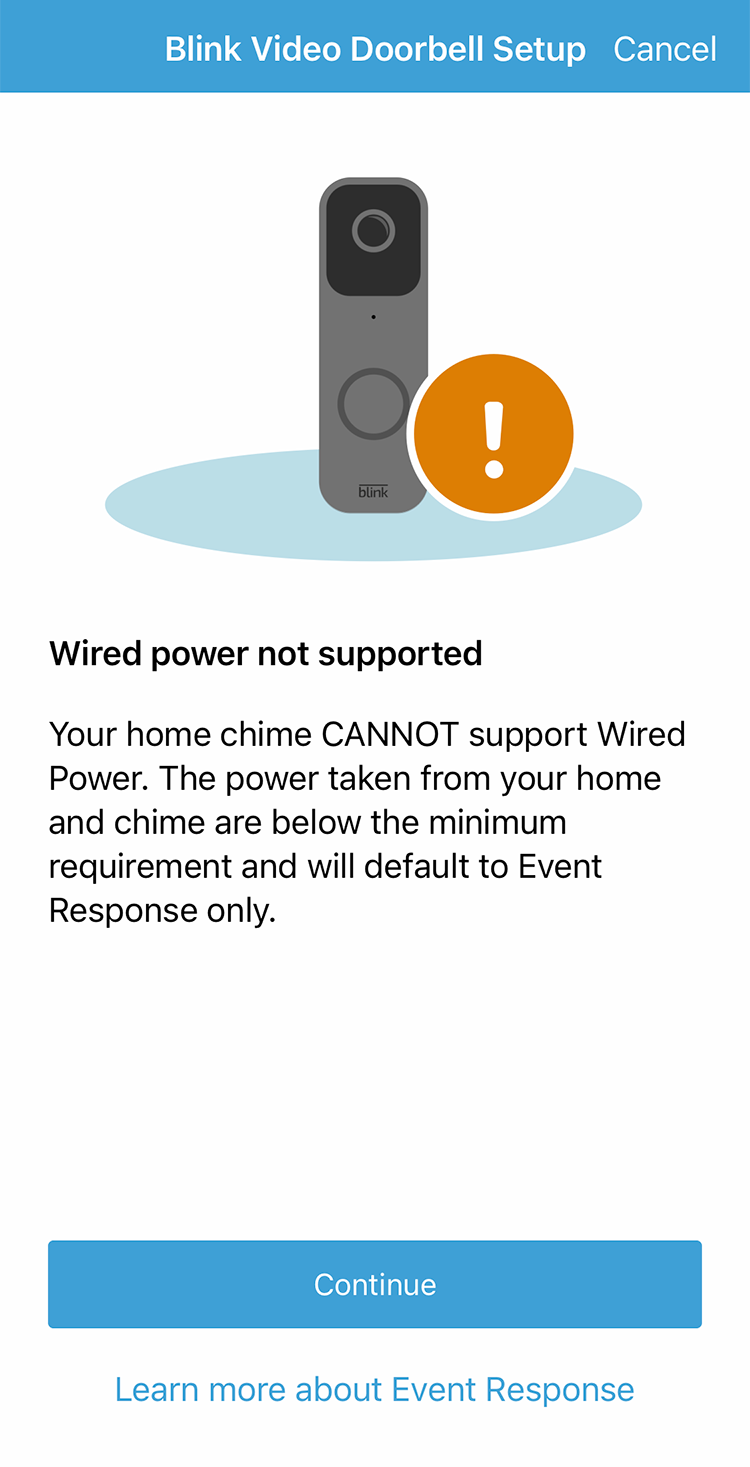
| Connection successful, tap "Continue" | Power level is not compatible, enter Event Response way. |
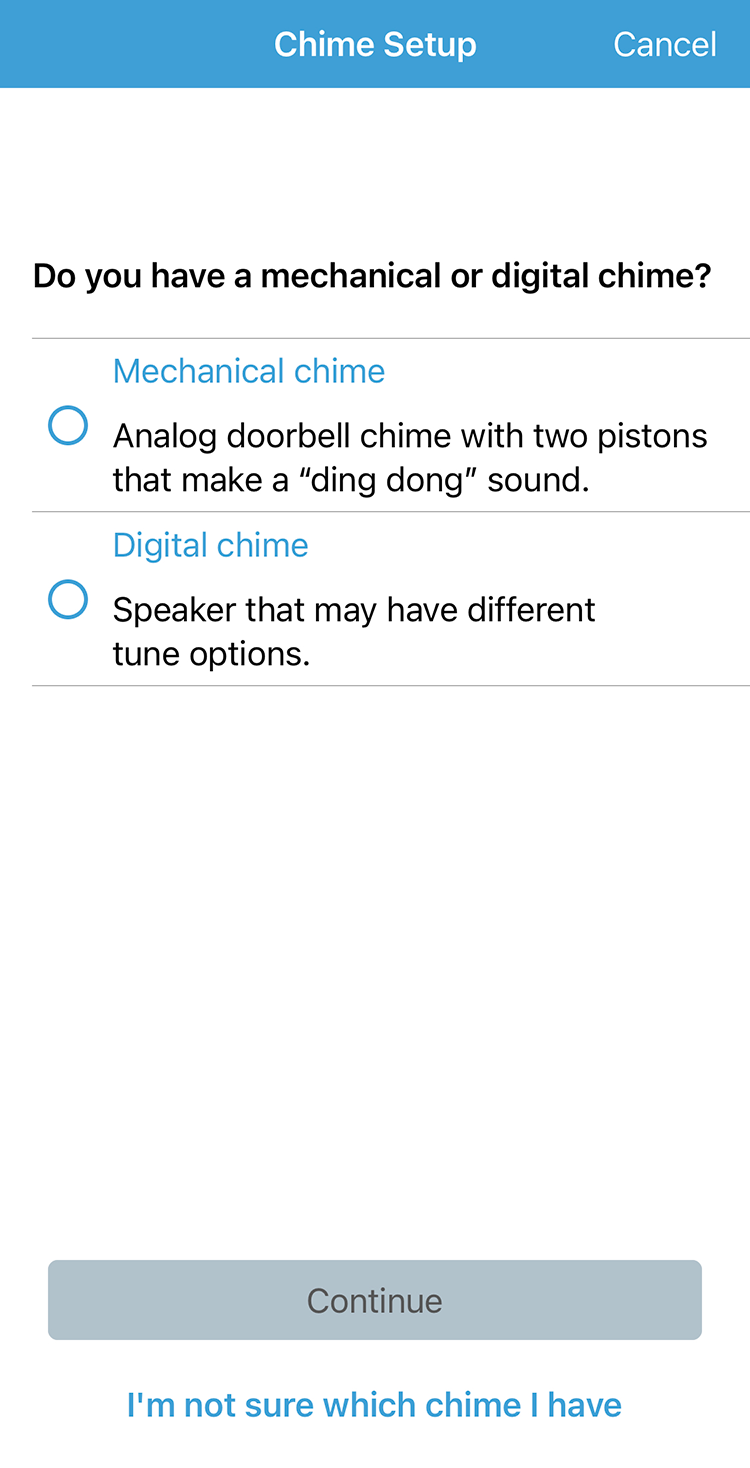
At present, y'all are asked to select whether you have a mechanical or digital chime. A mechanical chime makes sound by a physical hammer striking a metal bell or bar. A digital chime plays an electronic recording. If you are having difficulty, delight tap the "I'm non sure which chime I accept" link in the Glimmer app or visit this article for more help.
Make your selection and tap "Continue".
When you make a chime choice, the Blink app volition present a calibration screen that is appropriate to your system. Please choose the right link beneath to go along with chime calibration instructions.
Source: https://support.blinkforhome.com/en_US/blink-video-doorbell-wired-installation
Posted by: bishopsuese1947.blogspot.com
0 Response to "How To Install Blink Doorbell Camera"
Post a Comment